

CodeWalkthrough: Compression Tool in Scala
Another one of my CodingChallenges.fyi projects to brush up my Scala skills

I decided to try another one of John Crickett’s coding challenge to brush up on my Scala knowledge and chose to do the Compression Tool challenge as it had a mix of coding and math/algorithm learning points.
The challenge involves writing a program to compress a text file, much like zip or tar.
In this walkthrough, I will first describe the basic idea behind the mechanism of file compression used in this challenge before going through the various steps involved in the compression and decompression process. As usual, it’d be better if you could download the code repository and follow along.
Compression Mechanism
Basic Idea
A text file can be thought of as a collection of characters. On top of that, the characters do not occur at random, which means that certain characters will occur more frequently than others. For example, the letter “E” is the most common letter in the English language followed by “A”.
The characters are written to a file in the form of bytes. For example, the UTF-8 encoding encodes each character in 8-bits (or a 1-byte). Thus if we can find a way to represent characters in a way that is shorter than 8 bits per character (in the case of UTF-8) then we can encode the same amount of information in less data.
Take for example, the word “AHHHH!”. If we represent “H” with the bit 0, “A” with the bits 10 and “!” with the bits 11, then “AHHHH!” can be represented as the bits 10000011. If we were to write “AHHHH!” plainly to a text file it would take 6 bytes (assuming 1 byte per character). If we were to represent the same word using our bit code, then it would only take 1 byte (i.e. 8 bits).
Even better, if we could represent the more frequent characters with shorter codes, then we would achieve even greater compression. This can be plainly seen if we represented “H” with 3 bits instead of 1 bit we would have ended up with a 16 bit encoded string. Still a compression from the original but not as much.
This is what we would be trying to do in this coding challenge.
Huffman Trees & Huffman Coding
Huffman trees are binary trees where each node is either a leaf node or a branch node. In our case, a leaf node is the node that holds the character in our text and a branch node is an intermediate node that has a left branch and a right branch.
Each node also has a weight attribute. For the leaf node, the weight attribute is the frequency with which its character appears in the text. For the branch node, the weight attribute is the sum of the weight of both its branches. The tree definition code is shown below.

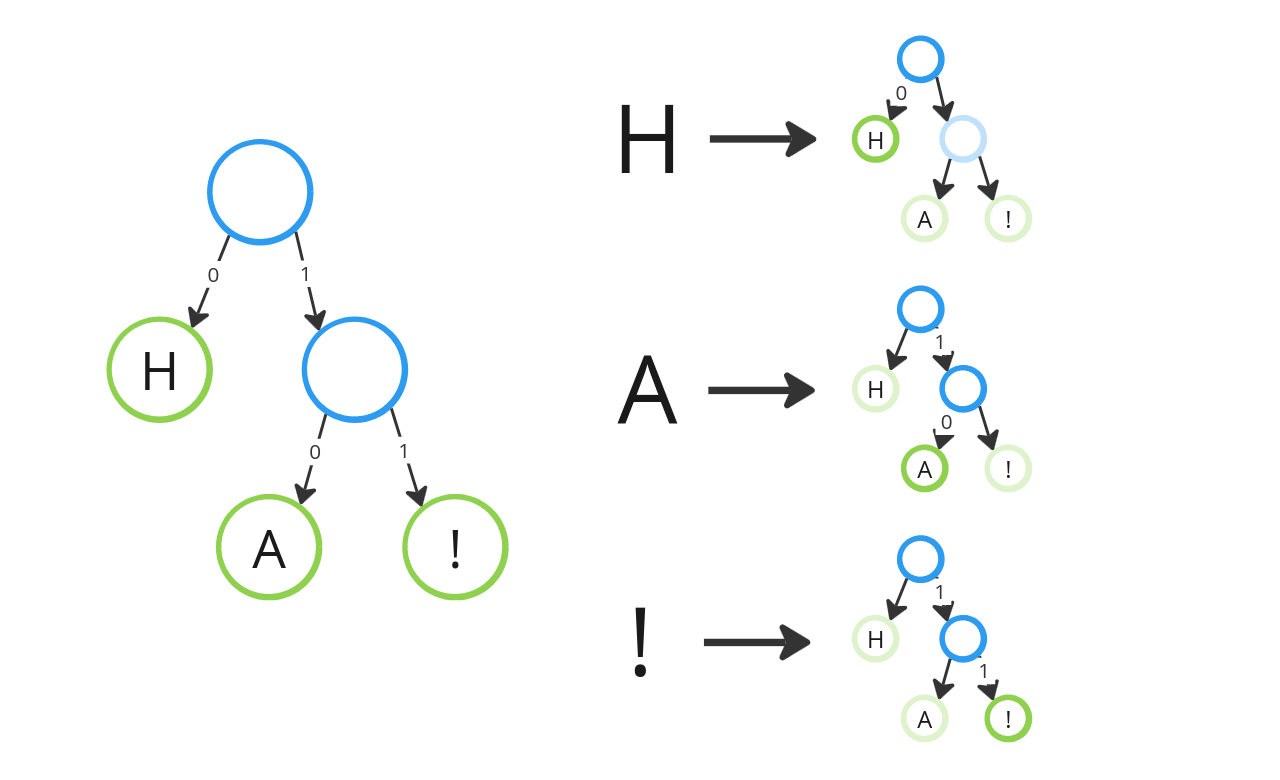
Suppose we were given the Huffman tree below and the path to each character is represented by a series of “0”s (left branch) and “1”s (right branch). Then as before, “H” can thus be represented by the path from the tree’s root node to the leaf node containing “H”, in this case 0. The same goes for “A” and “!” which correspond the paths 10 and 11, respectively.
Huffman coding is the algorithm to generate a Huffman code tree such that the most frequent character has the shortest path (i.e. code).
Basically, what you do is you start with a collection of leaf nodes containing all the characters you have in your text and you sort them in ascending order of their weight. You then pop the two lowest weighted nodes off the collection and combine them into a branch node which is then re-inserted into the collection and again sorted by weight. You repeat this process repeatedly until you are left with only one branch node in the collection and that’s the Huffman tree root node. A good explanation is given here (also in the coding challenge website).
Notice that since the collection of Huffman nodes are always sorted in ascending order of weight, the most frequent character will always be the last to be merged into the tree and therefore have the shortest Huffman tree path.
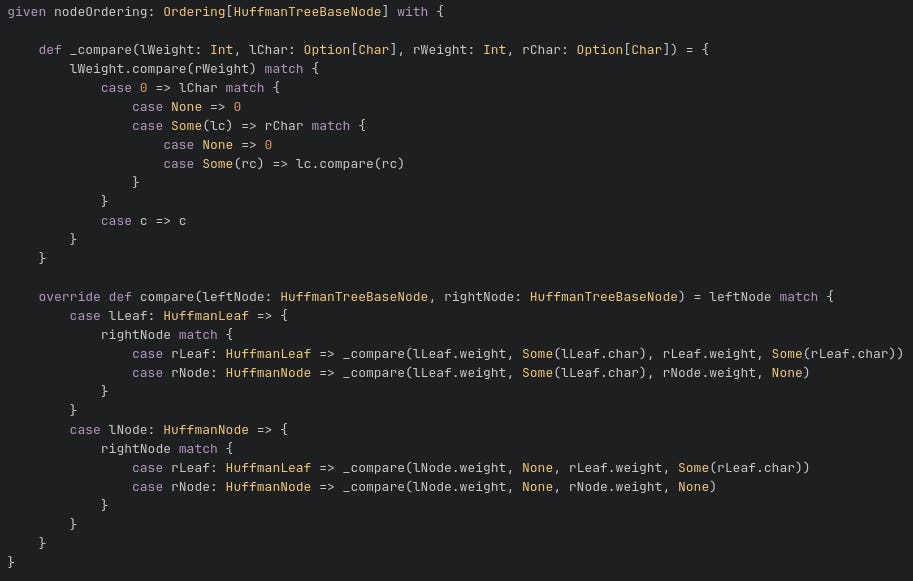
To make the sorting of the nodes easier, I created an Ordering instance that would be used implicitly by the sorted method, shown below. See code here.
The Huffman code tree is the key object that we will be using to help us generate the text encoding to achieve compression.
Now that we know how the compression takes place conceptually, let’s move on to the implementation.
Compression Process
The compression is executed using the compress function here.
Step 1: Generate Frequency Table
The first step is to figure out which characters are in the text file and how frequently they occur. Remember that the weights of the leaf nodes are the frequency of occurrence of the character they contain. This is done using the calculateFrequencyTable function.
Step 2: Create Huffman Code Tree
Using the frequency table, we generate the Huffman code tree using the algorithm detailed here with generateFileHuffmanTree funciton. This will be the Huffman code tree that we will use to generate a series of “paths” for each character in our text file.
The key logic is show below.
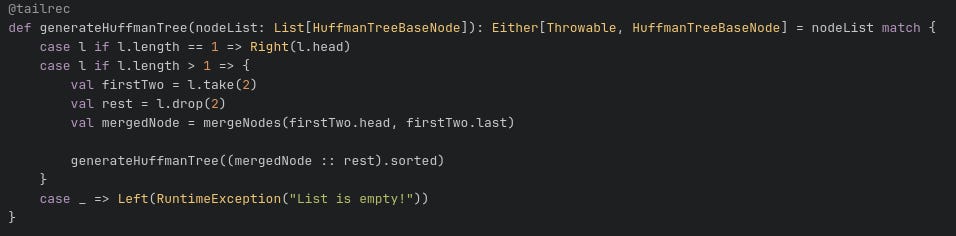
This is a recursive function that takes a list of Huffman tree nodes that are sorted and repeatedly merges the first two lowest weight nodes until only the root node is left.
Step 3: Create Prefix Table
We then look through all the leaf nodes of the Huffman code tree and retrieve their paths from the root node via the generateFilePrefixTable function. The result is a map of the character to its path.
The key logic is shown below.

For the Huffman code tree in our example above, we would have Map(‘A’ → 0, ‘H’ → 10, ‘!’ → 11).
Step 4: Encode text to bit string
We then loop through the characters in the text file and create a string of “0”s and “1” using the prefix table by concatenating the Huffman code tree paths of each character.
The function used is here.
Step 5: Pack bit string into bytes
Now if we were to simply write the long string of “0”s and “1”s generated in the previous step, we would not only fail to achieve compression, we would most likely make the file even bigger! This is because if we write each “0” or “1” as characters, each character would still take at least 1 byte! Not to mention that there will be many characters that have Huffman code tree path lengths greater than 1, which means each character would explode to become multiple bytes worth of data.
What we need to do is to treat the “0”s and “1”s as bits and pack them as bytes. After all, each byte is worth 8 bits. This is where the compression actually take place.
This is done using the packToBytes function which results in an array of bytes.
The key logic is show below.

The string of “0”s and “1”s are grouped into groups of 8 and parsed into an integer before converting to byte.
Step 6: Write to file
Now for the final step of the compression process. This also happens to be the hardest step for me because of the way Java treats its characters.
In order for the file to be “decompressible”, we can’t simply write the array of bytes obtained in the previous step. This is because we would end up with a bunch of bits or Huffman code tree paths that are jumbled up together with no way of retrieving the corresponding characters.
Thus we need to also write the information that would help us make sense of the byte array of Huffman code tree paths in a header section. The header information is precisely the frequency table we calculated in the first step.
Initially, I had written the frequency table in the header as plain text like what you would usually do with java.io.FileWriter. However, this made things weird later when I am trying to write an array of bytes.
On top of that, I found that buffered output classes like java.io.FileWriter actually can’t write raw bytes. To do so you would have to use something like java.io.FileOutputStream which can take a byte array (see here).
The next thing I found is that although in Scala characters are 2 bytes by default, like in Java, some characters can take more than 2 bytes. If the characters are your run-of-the-mill characters you see in English texts then you can assume a 2-byte representation. But that is not the case in general. It is definitely not the case for the challenge text which is the Les Miserables script which contains European accented characters (or if you want to encode Chinese or Japanese texts).
This caused me a great deal of confusion and pain when I had thought I was done with the challenge (assuming 2 byte characters) but only to end up with jibberish when I try to decompress the file.
Given the above and taking inspiration of header formats from other compression algorithms (see here and here), I realised that my header should have a more fixed format and a series of bytes that signaled the end of the header.
So to encode the frequency table, I decided the encode the key, which is a character, to 4 bytes and the count, which is an integer, also to 4 bytes (see conversion logic here).

In this way, I have a predictable way to obtain my keys and values to create my frequency table.
I then ended my header with the bytes of “0” and 0. The reason why I chose this is because there should be no entry in the frequency table where there is 0 count character.
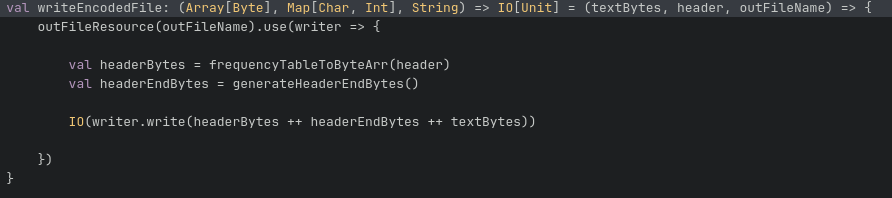
Then I wrote the bytes obtained from step 5 to finish things off. See here.
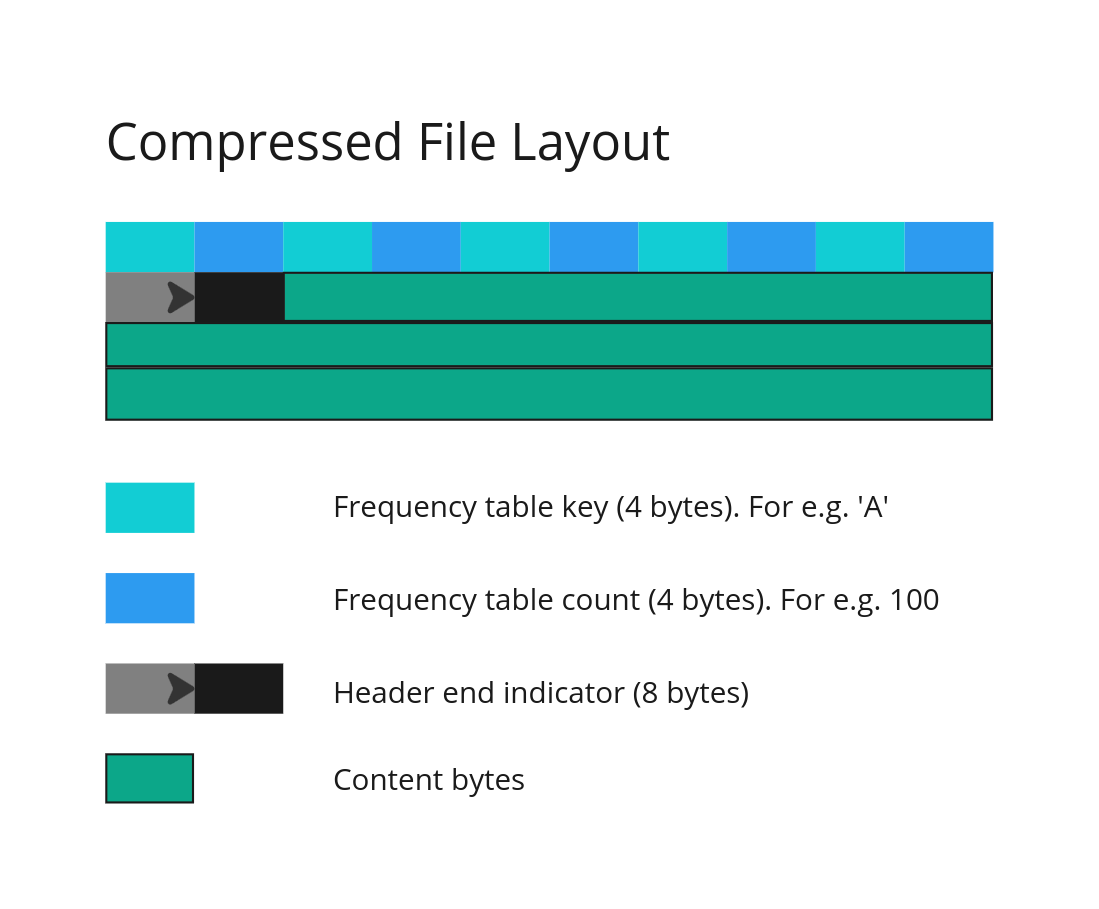
The compressed file would start with a header section which consists of the frequency table where each character is encoded as 4 bytes followed by 4 bytes that represent the count of the character in the file. This is then followed by 8 bytes representing “0”0. The array of bytes representing the encoded Huffman tree paths are then written last. See the layout of the compressed file below.
Decompression Process
The decompression process is performed using the decompress function here.
Step 1: Read header and content from compressed file
The header and Huffman tree paths are read using the parseBytes function here. The need to read out the header bytes consistently is the reason why I had encoded the frequency table keys and values uniformly into 4 bytes each. Firstly, this is to allow for characters which are represented by more than 2 bytes. Secondly, for long files, certain characters can occur a large number of times. Thus using 4 bytes for the count of each character allows the count to be represented as a 32-bit integer.
To make things easier, I used a java.nio.ByteBuffer, than allows me to easily retrieve the bytes from the read file.
Step 2: Create Huffman Code Tree
Having read the frequency table from the compressed file, I can create the Huffman code tree using the process used in Step 2 of the compression process.
Step 3: Retrieve characters from Huffman Code Tree
With the Huffman tree, I can now use the bytes read from the compressed file to retrieve the encoded characters. This is done by:
Converting each byte into bits
Following the bits from the Huffman tree root until I reach a leaf node
Upon reaching a leaf node, I append the character belonging to the leaf node into the content string and restart the search at the root of the Huffman tree
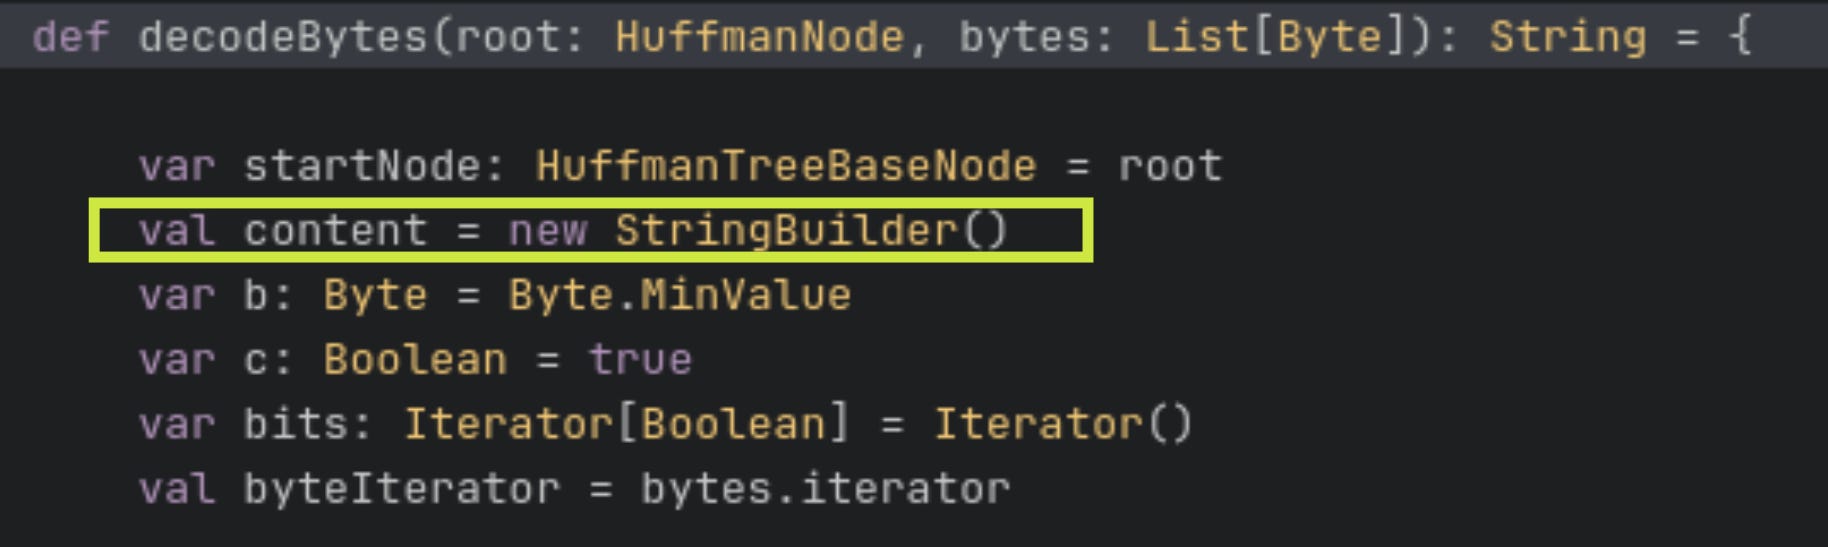
This process is done using the decodeBytes function here. In this function, the decoded characters are added to a content string.
This step happens to be the most difficult step for me in writing the decompression process. Initially, I faced a weird performance issue where the decompression took a very long time. More interestingly while the initial bytes were decoded very quickly, the decompression process became slower over time as more bytes were being decoded.
After some research, I found that it was because I was adding characters to the overall content string via string concatenation. In other words, I was doing content += newCharacter. This is because strings are immutable objects. Every time I add a new character to the content string, instead of changing the content string, I am actually recreating the content string by copying the old content and adding the new character. This is why as the decoding process progresses, the string gets longer, the copying time gets longer and as a result the decompression process gets slower.
The way around this is to use a StringBuilder instead of instantiating the content string as a pure string. See here and here for interesting information on the StringBuilder.
Write to file
Finally we write the content string to file.
Results & Discussion
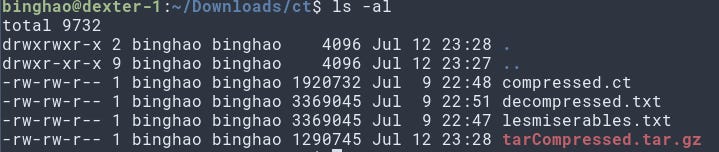
The test file is the Les Miserables text, which is around 3.36 MB. The compressed file from my compression tool resulted in a file that is around 1.92 MB (compressed.ct).
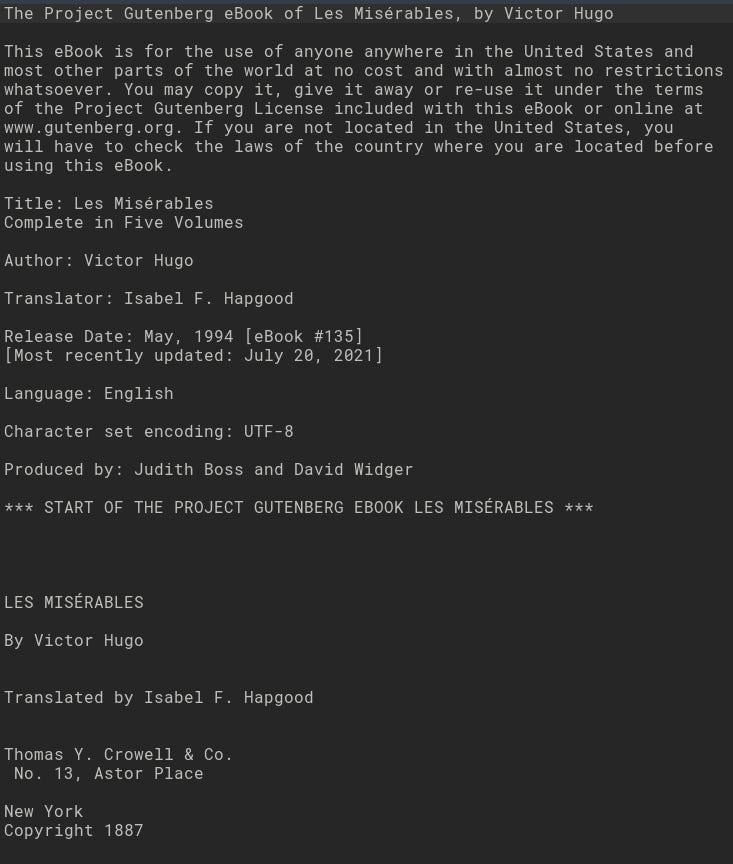
Decompressing the compressed file resulted in the file that is exactly the same size as the original. As can be seen in the text snippet below, the text is intelligible with no weird characters.
Compressing with tar resulted in a filet that is only 1.29 MB which is quite a bit smaller than my approach. So perhaps there is some room for improvement yet.
Conclusion
I’ve never written something like this before. It was really interesting looking into the compression algorithm and a nice change in pace from my daily work. Struggling with the difficulties also forced me to dive deeper into the workings of Scala.